10 Aug Building a Fence
In some jurisdictions, you don’t need a permit to erect a fence, but it’s a good idea to check local regulations just in case. Softwoods such as redwood, cedar and cypress are best suited for the building of fences due to their rot-resistant nature. Such construction requires basic carpentry skills and hand tools.
- Plot the fence or wall line and mark the post locations. Make a site map and carefully measure each post location with stakes at each end or post location. This will ensure you have proper spacing between the posts, as well as accurate dimensions for footings to provide strength and support.
- Determine the fence line and make sure it is put at least six inches back from the property line. Adjust the mason string until it is level, using a line level as a guide.
- Set posts below the frost line and on top of a bed of rock or gravel that has been forced down firmly, then fill the area around the posts with packed-down rock and gravel. (Make sure the bottom end of the post grain is not sitting in water).
- For fences 30 feet or more in length, additional stakes should be driven in every 15 feet or so, aligned with the end stakes. If not, the wind could blow your mason’s line, leaving you with a bowed fence.
- For the basic fence, nail 2-by-4 top rails into place with 16d galvanized box nails. It should be predrilled to prevent splitting.
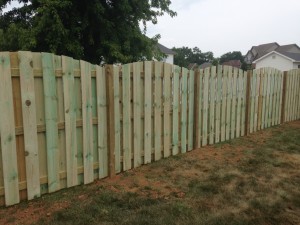
- The boards run vertically between posts and rails within a frame of 1-by-1s. The frames form stops for the fence boards, so they don’t wander when you nail them in.
- Combine the width of the gate and the clearance necessary for the hinges and latch hardware to find the on-centre spacing for the gate posts; then add four inches.
- The mason string should be marked with masking tape where the gate posts will be installed. Next, make reference to your site map, then measure and mark the line post locations on the string, using masking tape, which indicates the centre of the post, not the edge.
- When building a fence around a square or rectangular area, it is probably a good idea to form a 90-degree angle.
It’s obviously a lot easier to build a fence on a flat surface. But there is usually some sort of undulation in the land. Erecting contoured or stepped fences are excellent strategies to deal with slopes.
It’s very important that the posts be perfectly aligned and plumb. Postholes should be dug six inches deeper than local building codes require. Dig footings and set the posts in concrete. Allow them to cure for two days before removing the braces.


No Comments